Mechanical & fabrication · 2026
Ski wall mount
Skis held on the wall by nothing but the fit of the oak — a parametric model that regenerates for any ski, CNC milled on a machine I built.
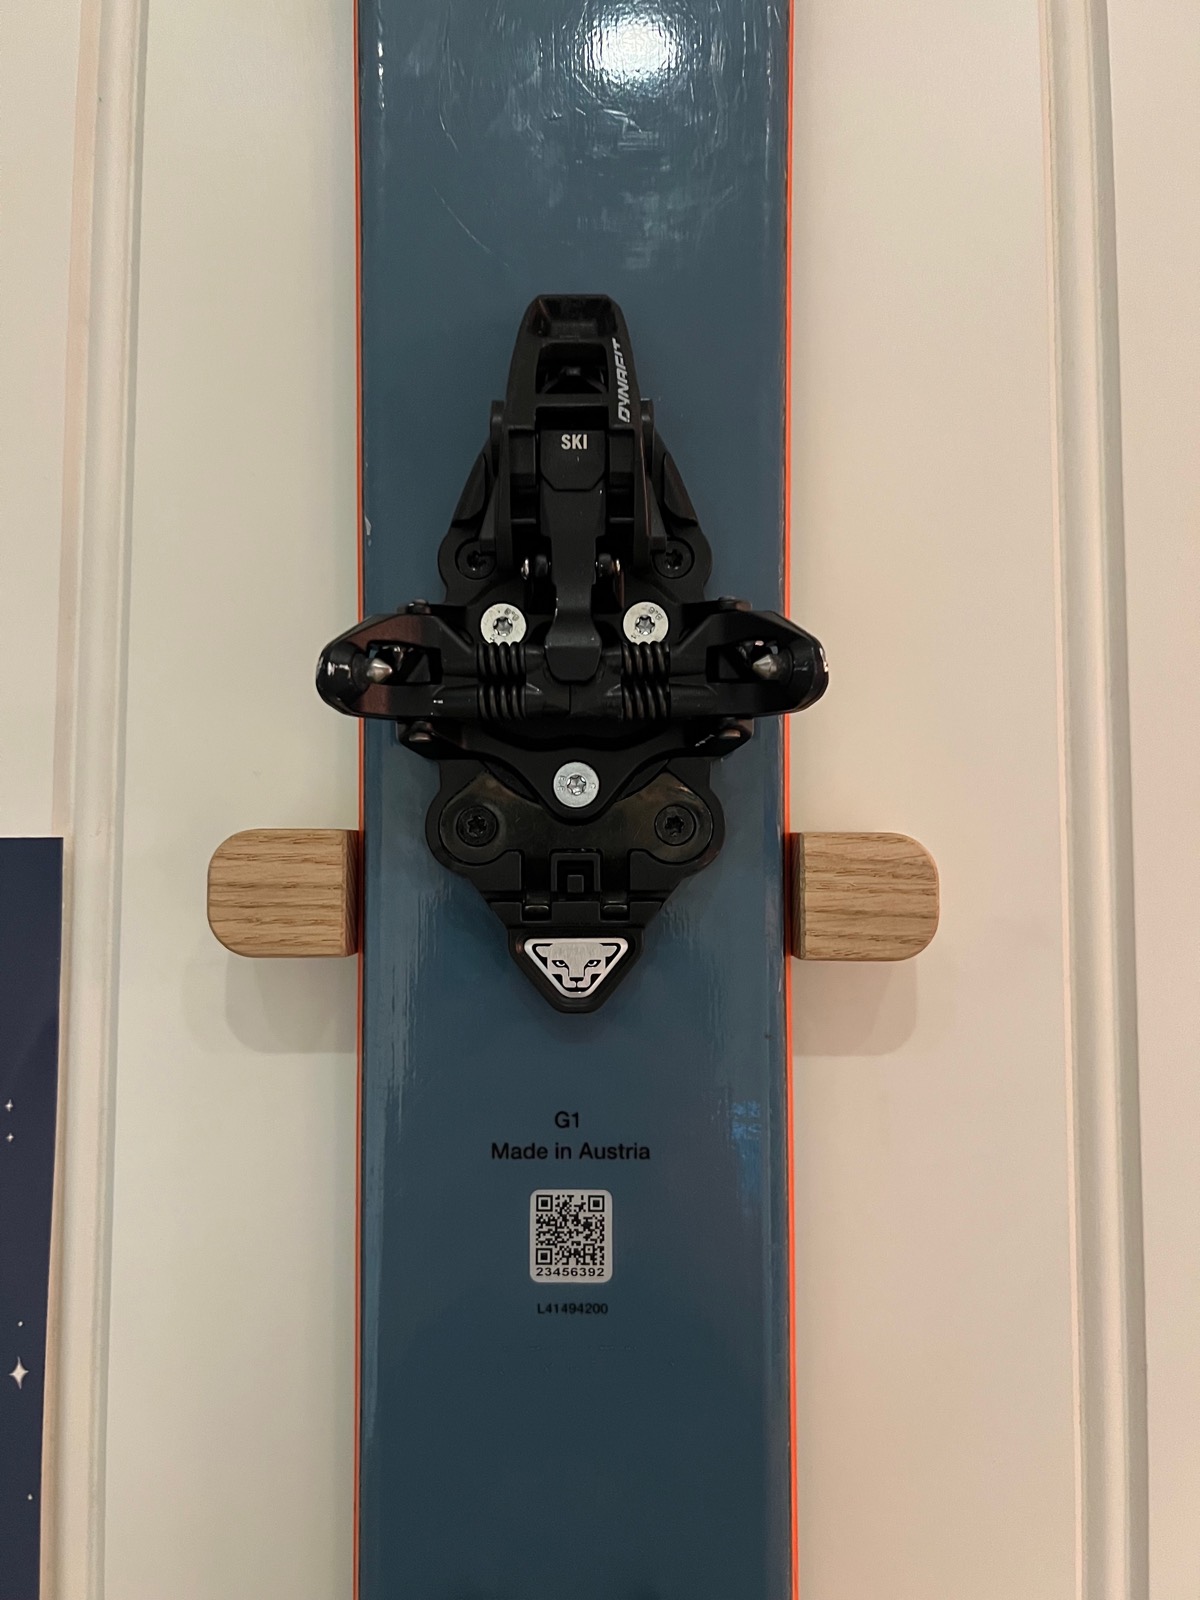
I ski, and last winter I wanted the skis in my room rather than in a cupboard — on the wall, as something to look at, not gear to be stowed and dug out again.
The obvious answer is a 3D-printed mount. I did not want one. They look cheap and they feel cheap, and a printed bracket next to a pair of skis is the part your eye goes to first.
Held by nothing but the fit
The mount is one bar of oak with a pocket milled across the middle. The ski's waist drops into the pocket, and the two raised ends stand proud on either side of it. Nothing clamps to the ski, nothing straps over it, nothing screws into it. Two screws hold the bracket to the wall, and that is every fastener in the design.
What holds the ski up is its own shape. A ski is narrowest at the waist and widens towards the tail, so a pocket cut to the waist width will only accept the ski at one point along its length — push it down and the widening tail wedges against the oak. The ski hangs on the taper.
That is what makes the mount almost disappear. It is also what makes it unforgiving: the pocket has to match a specific pair of skis, or it either will not take the ski or will not hold it.
One model, any ski
So I built it parametric. The Fusion 360 model takes the ski's waist width as an input, and the whole bracket regenerates around it — pocket width, the position of the raised ends, the outer profile.
That turned a one-off into something repeatable. I have since made sets for friends with completely different skis, and it costs nothing but typing a new number and re-running the toolpaths. Designing it once properly was less work than measuring and redrawing it three times.
Machining it
Both parts were CNC milled from solid oak on my Ooznest WorkBee — the machine I built myself — with CAM done in Fusion 360.
It is a small part, but it uses most of a real CAM workflow:
| Surfacing | Large flat end mill to bring the top of the stock true |
| Contour | Smaller bit, so less material is cut to waste and parts can be nested close together on one piece of stock |
| The recess the ski's waist drops into | |
| Drilling | Screw holes for the wall fixings |
| Chamfer | Chamfer bit around every edge |
The chamfer is the one that matters most in use. It softens the look, but the real reason is the lead-in: dropping a ski into an interference fit is much easier when the edges guide it in instead of catching on it.
The part I got wrong
The first version worked — the skis hung, and held. But they were not quite right: the tails leaned in and rested against the wall, so each ski sat at a slight angle instead of parallel to it. Not a failure, but visible, and the whole point was how it looked.
So I designed a second part, a tilt stop, machined from the same oak. It holds the tail off the wall at the correct distance, and the ski now hangs with an even gap down its full length — close to floating.